Oracle E-Business Suite 12.2.15 Installation on Windows
PART 1 ‐ PHASES & PREPRARTION
Phases
You cannot create a R12.2.15 instance just by one installation. Oracle only provides the installation package for the initial R12.2.0 release. Then, it is progressively updated from the initial version to the most update-to-date version. In each major release upgrade, the operation system is also updated to align with the Microsoft server release that time. The C++ compiler is also changed according to the OS requirement.
In here we have defined 4 phases. Each phase is aligned with the time that matches the EBS release, Windows Server version, and Visual Studio version.
| Phase | OS | EBS Release | Visual Studio | DB Version | EBS Release Year |
|---|---|---|---|---|---|
| A | Windows 2008 | 12.2.0 -> 12.2.5 | VS 2008 | 12.1 | 2013 -> 2015 |
| B | Windows 2012 | 12.2.5 -> 12.2.10 | VS 2017 | 12.1 | 2015 -> 2020 |
| C | Windows 2016 | 12.2.10 -> 12.2.15 | VS 2017 | 12.1 | 2020 -> 2025 |
| D | Windows 2019 | 12.2.15 -> | VS 2019 | 19c | 2025 -> |
Note
Windows Server must be upgraded to the immediate next release in order to keep the program and settings.
Preparation
Virtual Machine
Create one virtual machine with this specification (Use VMware Workstation, Microsoft Hyper-V, or Oracle Virtual Box):
Device Spec About Hard Drive 1 300-400 GB C Drive. It holds the OS and all Oracle EBS files Hard Drive 2 200 GB D Drive. It holds the staging files and other patches Memory 10 GB The fresh empty instance needs 300GB. The Vision demo instance needs extra 100GB.
For the VM, set the system clock back to 5 years ago. It can be done from the virtual machine bios, and make sure to uncheck the Internet Time Synchronize setting in Windows. It's because the SSL certificates in different components provided in the initial version of the installation package are way expired in current time. To avoid any unexpected errors due to expired SSL, just simple change the system clock matched to the time this version should exist.
You can synchronize the time again in Phase B, when all major components are upgraded.
Prepare the OS
Note
Run all actions as administrator.
Install
Windows Server 2008 R2 Enterprise (Full Installation)to the virtual machine.After the OS is installed, add these Features:
.NET Framework 3.5.1 Feature
Desktop Experience
Windows Powershell Integrated Scripting Environment
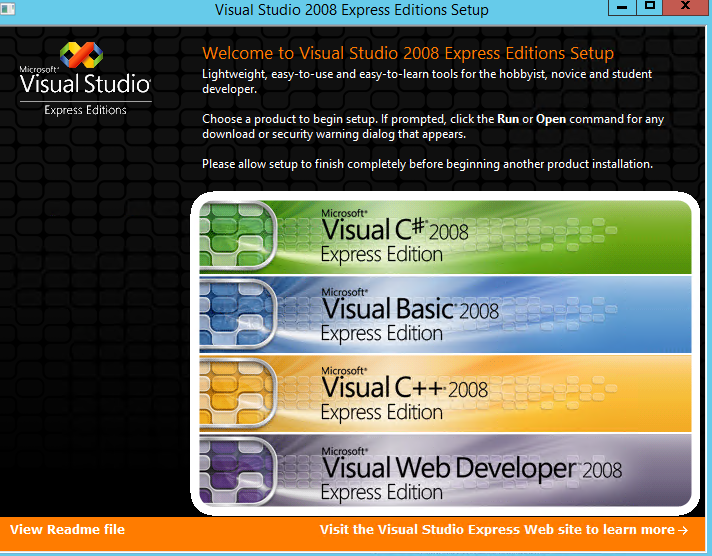
Install Visual Studio 2008 Express Edition
Install the Visual C++ 2008 Express Only
No space in the installed location, e.g.
C:\VS2008
Install Microsoft Visual C++ 2005 SP1 Redistributable Package MFC Security Update
https://www.microsoft.com/en-us/download/details.aspx?id=26347
Install Microsoft Visual C++ 2008 Service Pack 1 Redistributable Package MFC Security Update
https://www.microsoft.com/en-us/download/details.aspx?id=26368
Install Microsoft Visual C++ 2010 Service Pack 1 Redistributable Package MFC Security Update
https://www.microsoft.com/en-ca/download/details.aspx?id=26999
Install
cygwin. Use 3.3.6 64-bit version instead of the latest one.Download
setup-x86_64.exe(https://www.cygwin.com/setup-x86_64.exe) to a folderRun this command to start the download and installation:
xxxxxxxxxxSET CIRCA_URL=http://ctm.crouchingtigerhiddenfruitbat.org/pub/cygwin/circa/64bit/2022/11/23/063529setup-x86_64.exe --allow-unsupported-windows --no-verify --site %CIRCA_URL%Search for
zip, and select the latest version ofzipandunzip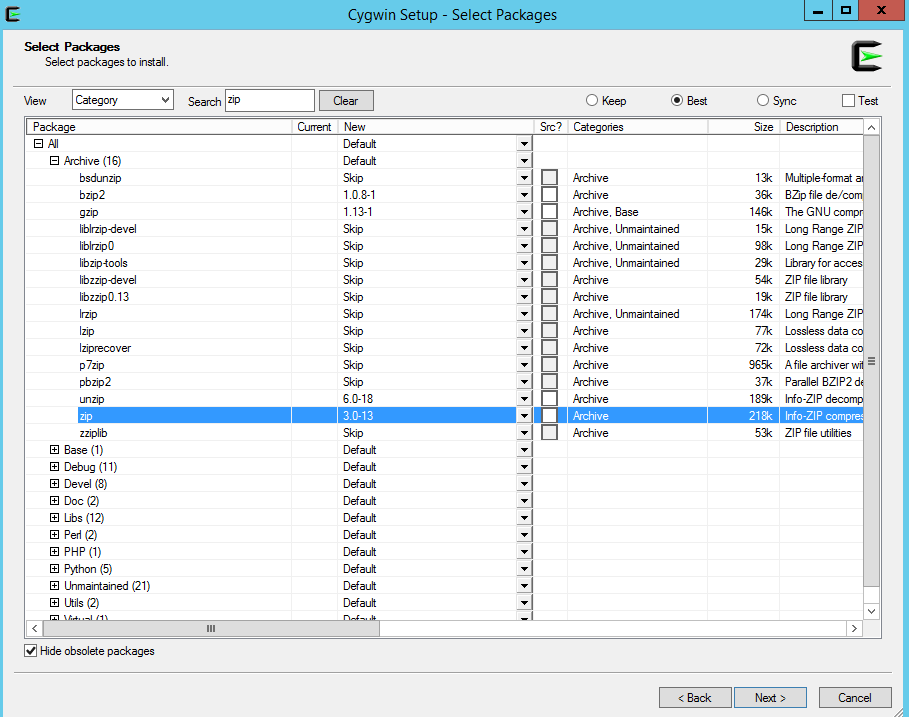
Search for
binutil, and select the latest version ofbinutil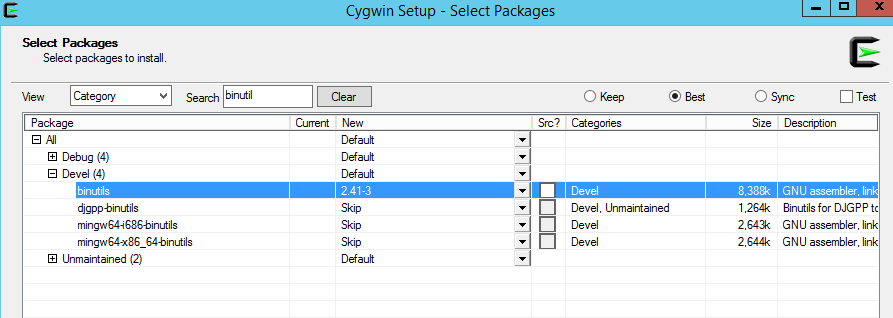
Copy
gnmumake.exetoc:\cygwin64\binRename these files in
c:\cygwin64\bin. The original Windows commands should be used instead of the GNU one.dir.exe,link.exe,rmdir.exe
Add
C:\cygwin64\binto the end of system path
Copy
MSVCR71.dlltoC:\Windows\SysWOW64
Stage Area
Download files from
edelivery.oracle.comSelect
Download Package, andOracle E-Business Suite 12.2.15in search boxDownload the zip files (see details) and put them in a folder (e.g.
D:\ARCHIVE) under the Stage drive.
unzip the
startCDarchives to stage folder (e.g.D:\STAGE)xxxxxxxxxxSET SOURCE=D:\ARCHIVESET TARGET=D:\STAGEunzip -o -q %SOURCE%\V100052-01_1of3.zip -d %TARGET%unzip -o -q %SOURCE%\V100052-01_2of3.zip -d %TARGET%unzip -o -q %SOURCE%\V100052-01_3of3.zip -d %TARGET%Unzip patch
36541996to patch folder. RunpatchRIStage.cmdxxxxxxxxxxunzip -o -q p36541996_R12_GENERIC.zip -d D:\PATCHcd D:\PATCH\36541996D:\PATCH\36541996>patchRIStage.cmdPatch directory is D:\PATCH\36541996Enter the location of the Rapid Install Stage area: D:\STAGEStage directory is D:\STAGEExecuting the command:"D:\STAGE\startCD\Disk1\rapidwiz\jre\NT\1.6.0\bin\java.exe -classpath D:\PATCH\36541996;D:\STAGE\startCD\Disk1\rapidwiz\jlib\java;D:\STAGE\startCD\Disk1\rapidwiz\TechInstallers\DBInstallHome\fnd\java\3rdparty\stdalone\xmlparserv2.zip oracle.apps.ad.rapidwiz.util.PatchRIStage -stagedir D:\STAGE -patchdir D:\PATCH\36541996"Copied D:\PATCH\36541996/Disk1/rapidwiz/bin/stageData/zipFiles.dat to D:\STAGE/startCD/Disk1/rapidwiz/bin/stageData/zipFiles.datCompleted patching of the Rapid Install Stage area D:\STAGEThe logfile is patchRIStage.logThen run
buildStage.cmdunder startCD RapidWiz to create new stage area (response is enclosed by **):xxxxxxxxxxcd D:\STAGE\startCD\Disk1\rapidwiz\bin\buildStage.cmdBuild Stage Menu------------------------------------------------------1. Create new stage area.2. Copy new patches to current stage area.3. Display existing files in stage TechPatches.4. Exit menuEnter your choice [4]: **1**CMDOPTS is D:\STAGE\startCD\Disk1\rapidwiz\binSpecify the directory containing the zipped installation media:**D:\ARCHIVE**File list:D:\STAGE\startCD\Disk1\rapidwiz\bin\stageData\zipFiles.datThe set of zip files is complete.Unzip command is: D:\STAGE\startCD\Disk1\rapidwiz\unzip\NT\unzip.exe -oUnzipping V38049-01.zipUnzipping V38050-01_1of4.zip...Unzip command is: D:\STAGE\startCD\Disk1\rapidwiz\unzip\NT\unzip.exe -oAll files have been unzipped successfully.Stage area is confirmed to be complete.Command = cp D:\ARCHIVE\V100043-01.zip D:\STAGE\startCD\Disk1\rapidwiz\bin\stageData\epdFiles\epdNT.zip68 File(s) copiedStageBuilder will now stage the tech patches for NTCopying one-off patches to shiphomeD:\STAGE\startCD\Disk1\rapidwiz\bin\..\unzip\NT\unzip -o D:\STAGE\startCD\Disk1\rapidwiz\bin\..\Xpatches\NT.zip -d D:\STAGE\startCD\Disk1\rapidwiz\bin\..\..\..\..\TechPatchesArchive: D:/STAGE/startCD/Disk1/rapidwiz/bin/../Xpatches/NT.zipDone Copying additional patchesDirectory D:\STAGE\startCD\Disk1\rapidwiz\bin\..\..\..\..\TechInstallMedia is valid...Directory D:\STAGE\startCD\Disk1\rapidwiz\bin\..\..\..\..\TechInstallMedia\wls1036_generic is validStage area verifiedPress any key to continue . . .Unzip patch
36332179(RAPID INSTALL CONSOLIDATED BUNDLE PATCH 2 FOR STARTCD 51 (SEPTEMBER 2024)) to patch folder. RunpatchRIStage.cmd:xxxxxxxxxxD:\PATCH\36332179>patchRIStage.cmdPatch directory is D:\PATCH\36332179Enter the location of the Rapid Install Stage area:**D:\STAGE**Stage directory is D:\STAGEExecuting the command:"D:\STAGE\startCD\Disk1\rapidwiz\jre\NT\1.6.0\bin\java.exe -classpath D:\PATCH\36332179;D:\STAGE\startCD\Disk1\rapidwiz\jlib\java;D:\STAGE\startCD\Disk1\rapidwiz\TechInstallers\DBInstallHome\fnd\java\3rdparty\stdalone\xmlparserv2.zip oracle.apps.ad.rapidwiz.util.PatchRIStage -stagedir D:\STAGE -patchdir D:\PATCH\36332179"Copied D:\PATCH\36332179/Disk1/rapidwiz/template/adrunat.sh to D:\STAGE/startCD/Disk1/rapidwiz/template/adrunat.shCopied D:\PATCH\36332179/Disk1/rapidwiz/etc/AppStartupPropertyListener.class to D:\STAGE/startCD/Disk1/rapidwiz/etc/AppStartupPropertyListener.class...Copied D:\PATCH\36332179/Disk1/rapidwiz/TechInstallers/ASInstallHome/fnd/admin/template/txkFormsDoc.xml to D:\STAGE/startCD/Disk1/rapidwiz/TechInstallers/ASInstallHome/fnd/admin/template/txkFormsDoc.xmlCompleted patching of the Rapid Install Stage area D:\STAGEThe logfile is patchRIStage.logDo the same for Patch 32947483 [RAPID INSTALL CONSOLIDATED BUNDLE PATCH ON TOP OF STARTCD 51 (OCTOBER 2021)].
Run RapidWiz
buildStage.cmdagain but this time do the "Copy new patches" option:xxxxxxxxxxcd D:\STAGE\startCD\Disk1\rapidwiz\bin\buildStage.cmdBuild Stage Menu------------------------------------------------------1. Create new stage area.2. Copy new patches to current stage area.3. Display existing files in stage TechPatches.4. Exit menuEnter your choice [4]:**2**StageBuilder will now stage the tech patches for NTCopying one-off patches to shiphomeD:\STAGE\startCD\Disk1\rapidwiz\bin\..\unzip\NT\unzip -o D:\STAGE\startCD\Disk1\rapidwiz\bin\..\Xpatches\NT.zip -d D:\STAGE\startCD\Disk1\rapidwiz\bin\..\..\..\..\TechPatchesArchive: D:/STAGE/startCD/Disk1/rapidwiz/bin/../Xpatches/NT.zipcreating: D:/STAGE/startCD/Disk1/rapidwiz/bin/../../../../TechPatches/MiddleTier/31136426/extracting: D:/STAGE/startCD/Disk1/rapidwiz/bin/../../../../TechPatches/MiddleTier/31136426/p31136426_1036_Generic.zipDone Copying additional patchesDirectory D:\STAGE\startCD\Disk1\rapidwiz\bin\..\..\..\..\TechInstallMedia is valid...Directory D:\STAGE\startCD\Disk1\rapidwiz\bin\..\..\..\..\TechInstallMedia\wls1036_generic is validStage area verifiedPress any key to continue . . .Now the stage folder is completed. You can start the installation.
| Table of Content | Next |
| Home | Repositories | Blog |
© 2026 by Christopher Ho. All Rights Reserved